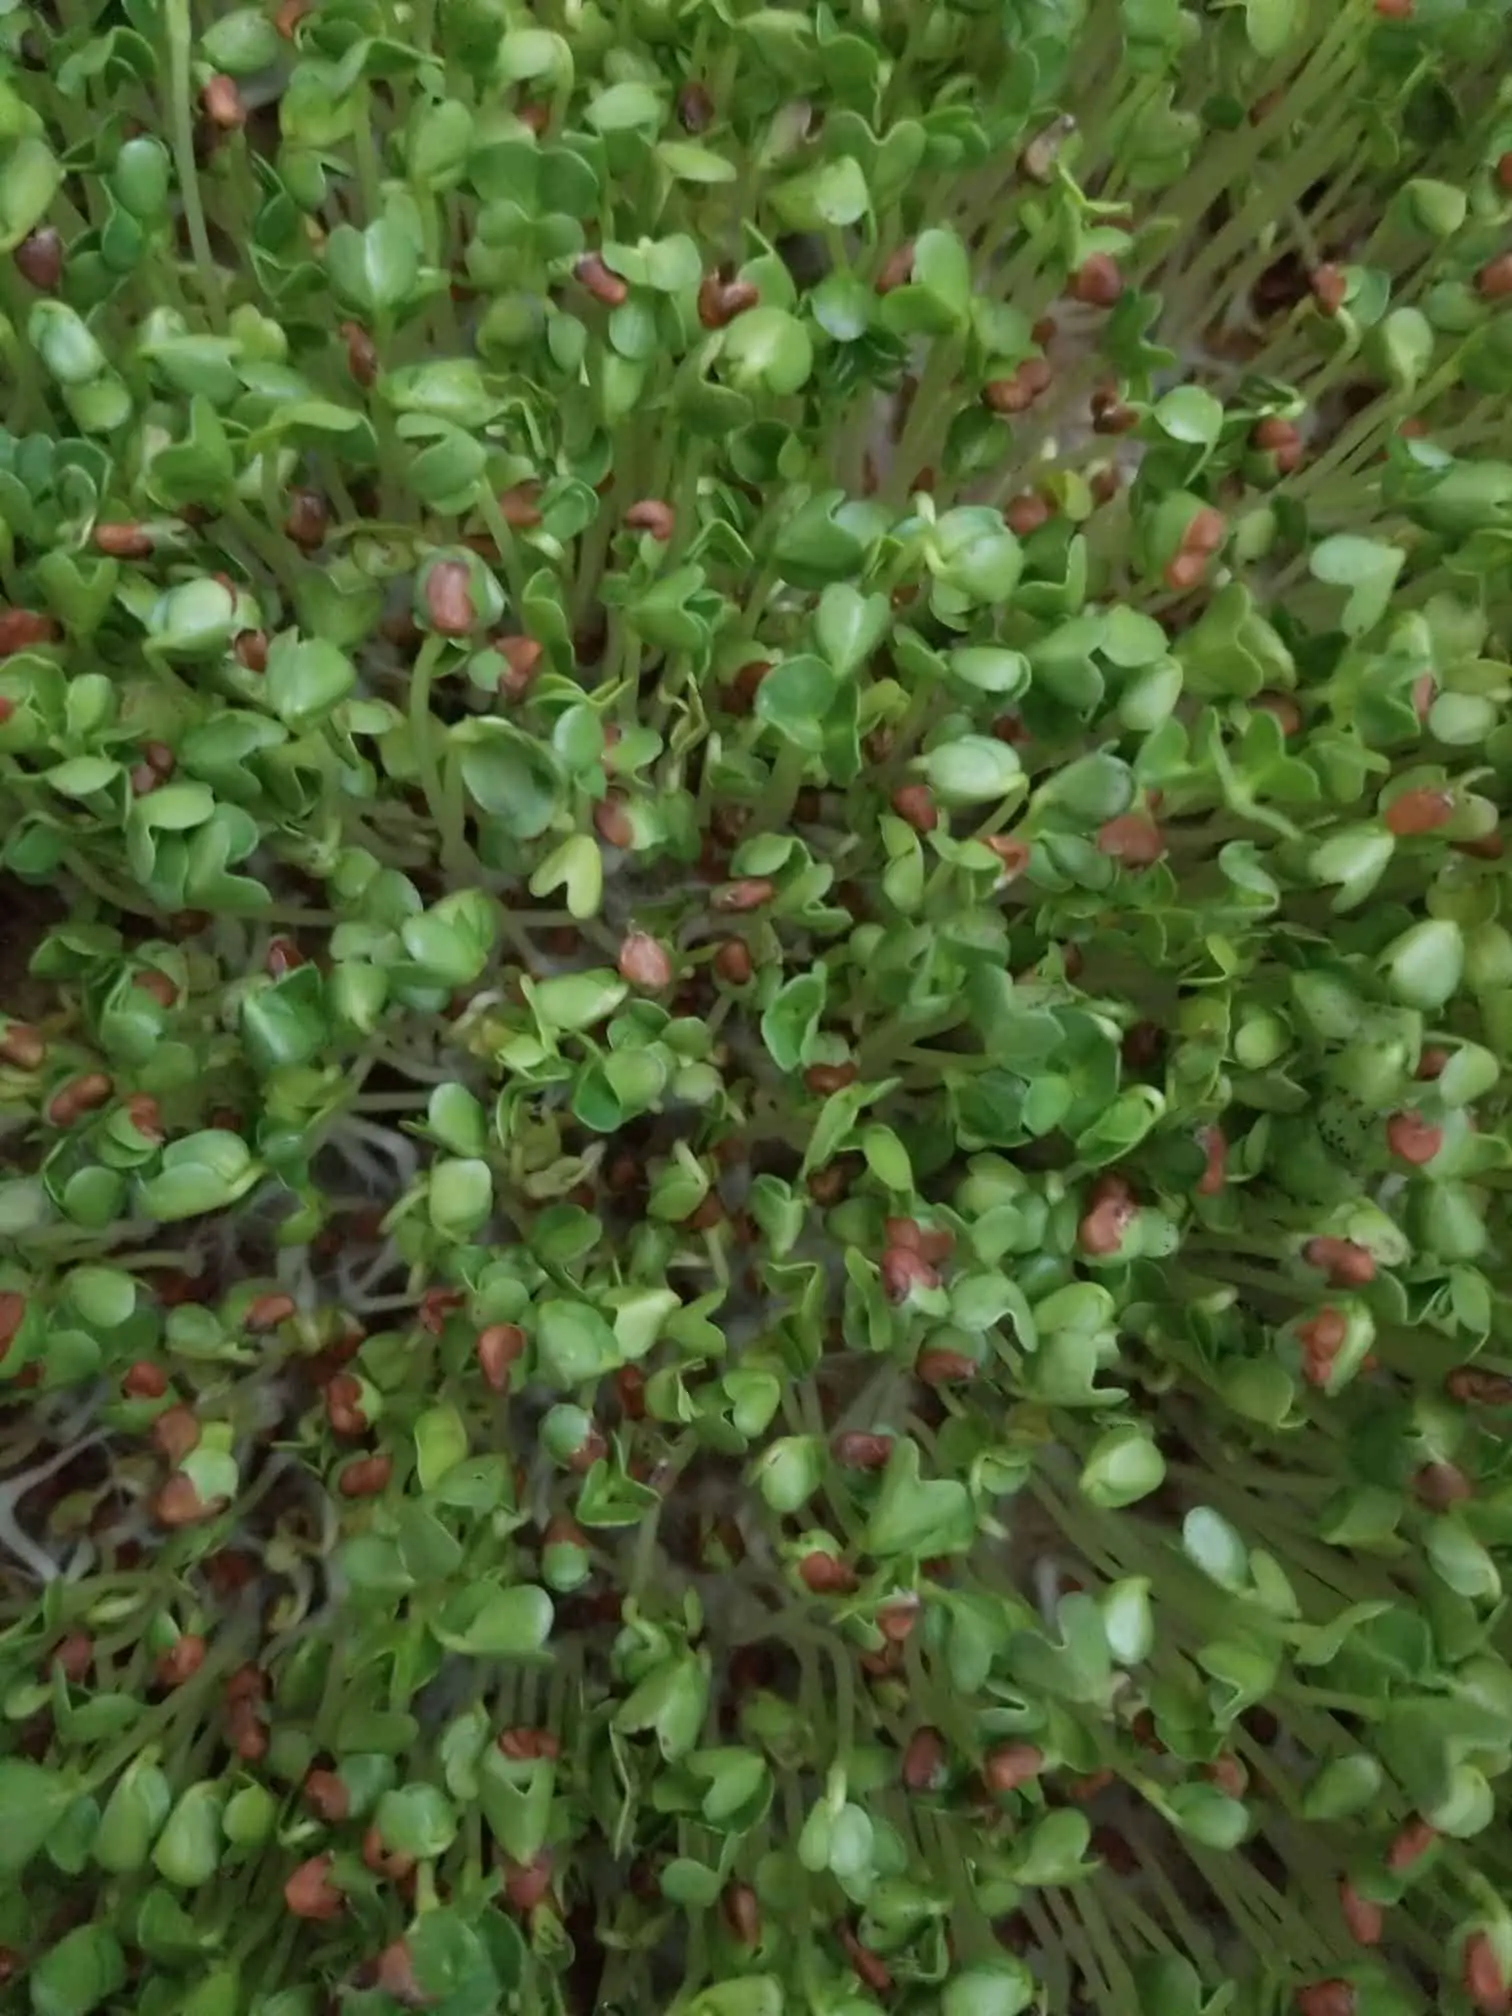
Microgreens are vegetable greens harvested during the early stages of the growth cycle. Because they are harvested during the early stages of growth, microgreens grow very quickly. Some of the most popular species of microgreens are ready to harvest within two weeks of sowing the seed. They are also very nutrient dense and contain a plethora of vitamins, nutrients, and fiber.
Although it is fairly easy to grow several species of microgreens, there are things that can go wrong. The list below describes some common pitfalls you should avoid when growing your microgreens.
1. Overwatering
Like many types of gardening, overwatering is common for microgreen growers. Plant roots need oxygen, and overwatering can deplete the oxygen supply (essentially drowning them), which in turn results in rot.
Check your microgreens daily to see if they need more water. During the germination phase (until the plants are about 1-inch tall), water your microgreens from the top with a light spray. Once your microgreens reach the vegetative phase, water them from the bottom. If you are using a growing pad, lift up the growing pad and add water from the bottom.
If you are growing your microgreens in soil, make sure you plant your microgreens in a tray with drainage holes. To water during the vegetative phase, put the tray of microgreens into a larger tray containing water.
If you are growing in soil, use the “finger test.” The finger test involves pushing your finger into the soil. It should be spongy and moist but not muddy.
Many growers recommend blowing fans on your microgreens if they have mold, which is typically caused by overwatering. While this can be a good solution, it is better to adjust your watering practices and avoid using fans if possible. This is because fans can actually spread mold spores to other growing trays.
2. Mistaking Root Hairs for Mold
Another common mistake that new microgreen growers make is confusing root hairs for mold. Personally, I made this mistake when growing my first tray of radish microgreens. I uncovered the tray after the blackout period and discovered the whole tray was covered with white, fuzzy stuff. I almost threw out the entire tray thinking it was mold! Luckily, I did a little online research and determined it was actually root hairs.
Root hairs are a natural part of the plant that “look” for water and nutrients. They start to develop at the very early stages of growth. At first glance, the root hairs may be so dense they look like mold. However, if you look closer, they are actually little hairs sticking out from the stem of individual microgreen stems.
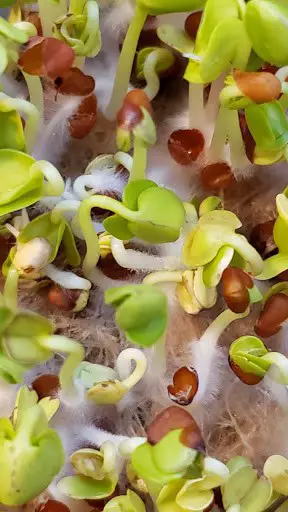
Mold is typically white or black. White mold is more common will have a spiderweb appearance rather than a fuzzy appearance. Unlike root hairs, it will probably not cover the entire tray.
Mold is typically an indication of overwatering, too much humidity, or poor air circulation.
If you are still unsure whether your microgreens are infected with mold or simply growing root hairs, you can try the spray test. Simply spray the white substance in question with water. If it “disappears,” it is very likely that the white stuff is root hairs. In contrast, mold will remain visible if you spray it with water.
If you determine that you do have mold growing on your microgreens, rip out the infected area. Then lightly spray the rest of your tray with a hydrogen peroxide solution. Make sure the hydrogen peroxide is food grade. You could also use grapefruit extract in place of hydrogen peroxide.
3. Overseeding
Microgreens are densely grown together. This can cause a variety of problems including root rot. When seeds are clumped together, the seeds on top will start to germinate while the seeds on the bottom will start to rot. Root rot is typically gray in color. When sowing your seeds, make sure the seeds are evenly spread on the growing pad or soil.
Overseeding can also cause damping off, which is a group of fungal diseases like pythium, fusarium, and rhizoctonia. Signs of damping off are shriveling leaves and dark spots. When microgreens are planted too densely, there can be poor air circulation. This poor air circulation can cause damping off.
If you are unsure about whether you are overseeding, it is better to err on the side of caution and go with a lower seeding density.
4. Not Sanitizing Your Equipment
Not sterilizing your equipment can cause problems for your microgreen crops. To prevent mold growth, you must clean the containers you use to grow microgreens. This will prevent any bacteria or microbes from infecting your next batch of microgreens.
To sterilize your growing trays, clean them with warm, soapy water. Then spray them with food-grade hydrogen peroxide, and let it sit for 20 minutes. Then rinse the growing tray and dry it off with a clean cloth.
5. Not Paying Attention to pH
Another mistake microgreen growers make is ignoring the pH of the water they are using to grow their microgreens. Although many people do successfully grown microgreens without adjusting the pH of the water, pH does impact the plants’ ability to absorb nutrients. Therefore, adjusting pH will result in a higher quality crop.
The pH is a measure of a substance’s acidity or alkalinity. pH can range from 0 to 14 with values below 7 indicating acidic conditions, and values above 7 indicating alkaline conditions. The pH of water is important because plants cannot access nutrients outside of a certain pH.
The water you use to grow microgreens should have a pH between 5.5 and 6.5.
The pH of tap water depends on where you live in the United States. Typically, tap water has a higher pH (more basic) than it should be for growing microgreens.
If the pH of your water is too high, simply add a little bit of lemon juice until the pH is within the ideal range. Alternatively, you could use General Hydroponics’ product called pH Down.
6. Growing Microgreens in “Greenhouse Conditions”
The ideal growing condition differs slightly depending on the species of microgreen you are growing. In general, the temperature of your growing area should be between 64°F and 75°F. The relative humidity should be between 35 and 50. If you live in a humid location, use a dehumidifier to adjust the humidity of your growing area.
These condition are cooler and drier than a typical greenhouse. Too much heat and humidity can result in issues with mold.
It is also important to grow your microgreens in an environment with good air circulation. This will help create a growing area with a uniform temperature and humidity.
7. Not Washing Microgreens Properly
Even if you do not use pesticides on your microgreens, you should wash them. However, if you do not wash your microgreens properly, they can get mushy and gross.
First, rinse your microgreens with cold water. Then pat them dry with a paper towel or kitchen towel. After drying them, put your microgreens in a salad spinner to remove any excess moisture. After using the salad spinner, pat the microgreens dry again.
If you have grown your microgreens in a small tray, you can also dunk the greens into a bowl of water. Make sure you do not submerge the soil, or things will get messy very quickly. After dunking the microgreens into the water, shake off the excess moisture.
8. Not Storing Microgreens Properly
Microgreens can be stored for 7 to 21 days depending on the species. For example, cabbage microgreens can be stored in the refrigerator up to 14 days, and radish microgreens can be stored in the refrigerator up to 21 days (Berba and Uchanski, 2012).
Do not store wet microgreens. They will become mushy. It is better to rinse microgreens once you are ready to eat them.
If you are going to store microgreens in the refrigerator, do not put them in a sealed bag. They will spoil more quickly than if you keep them in a container that allows airflow.
Ideally, the refrigerator you use to store microgreens should be set at a temperature of 39°F. Researchers at New Mexico State University conducted a study that found that the shelf life of arugula and cabbage microgreens decreases from 14 days to 7 days when the storage temperature was changed from 10°C (50°F) to 4°C (39.2°F). Similarly, the shelf life of radish microgreens decreased from 21 days to 14 days when the storage temperature was changed from 10°C (50°F) to 4°C (39.2°F) (Berba and Uchanski, 2012).
Finally, your microgreens should be stored in a dark area. Researchers at the University of Maryland found that radish microgreens deteriorate more quickly when exposed to light (Xiao et al. 2014).
9. Purchasing Expensive Growing Pads
Another mistake some microgreen growers make is using expensive growing pads like hemp pads. If you are just growing your own food, this may not be a big deal if you do not have a tight budget. However, if you are starting a microgreens business, expensive growing pads can cut into your profits significantly.
Here are some growing mediums to consider for budget conscious folks:
- Burlap – It is difficult to grow microgreens in burlap, but it is probably the cheapest growing medium available.
- 50/50 Blend of Perlite and Vermiculite
- A mixture of Coco Coir and Peat Moss
- Coco Coir
- Potting Soil – Make sure the potting soil is sterile.
Whether you are growing microgreens for yourself or for profit, it is important to research your growing medium.
For example, if being vegan is important to you, note that not all growing mediums are vegan because the glue that is used to assemble some growing pads is not vegan. That is one reason why it is important to research any product you are going to use to grow food.
10. Start Out Growing Advanced Crops
Another mistake some beginners make is growing crops that are difficult to grow. Some examples of these more advanced microgreens include amaranth, basil, or cilantro. I can definitely understand why people want to grow these microgreens. Basil is delicious, and amaranth is visually striking. However, it is probably still worth growing some beginner-friendly microgreens starting out.
Although there are certainly people who start out successfully growing these types of microgreens, many people will end up losing their entire crop. This will result in frustration and money loss. Keep in mind that some of these seeds can be very expensive.
Some good microgreens for beginners/new growers include radish, sunflower, and pea. These microgreens will grow quickly and are more forgiving of mistakes.
If you want to grow basil or cilantro microgreens, please know that I am not trying to squash those dreams. I am simply suggesting that you get some experience and save yourself some frustration before investing in those more expensive varieties.
11. Not Making Sure Your Equipment Is Food Safe
When you are growing microgreens (or any other type of plant you intend to eat), it is important to purchase products that are food safe. I am definitely an advocate of using budget-friendly materials to grow your own food. However, it is definitely worth a few extra bucks to make sure you are working with safe materials to ensure that you do not make yourself or other people sick.
For example, make sure you are purchasing food-grade seeds. Sunflower microgreens are one of the most popular types of microgreens to grow. There are some people who grow their sunflower microgreens using sunflower seeds intended for bird feeders. This is an unsafe practice because this type of sunflower seed is not packaged for human consumption. They could have been exposed to organisms that could make humans sick.
Rather than using bird seeds, grow your sunflower microgreens with black oil sunflower seeds. Before purchasing any type of seed, do a little research to make sure it is safe.
Another piece of equipment to consider is your growing tray. Make sure you are using growing trays made of bisphenol A (BPA) free plastic. BPA has been linked to various health problems, and it can leach into the water and soil you are using to grow your microgreens. Fortunately, there are several BPA free growing trays available for purchase online.
12. Reusing Soil Without
A common question regarding microgreens is whether you can use the soil from a previous batch of microgreens. You cannot use the soil immediately because it is important that you allow the roots and stems of the previous batch of microgreens to break down. Otherwise, microbes could cause issues for the new batch of microgreens. The video below describes how to reuse soil for microgreens.
13. Giving Up
Finally, some microgreen growers give up after a few failed attempts to grow microgreens. Although microgreens are generally considered easy to grow compared to other types of vegetables, every situation is different. People living in different locations will face different challenges when growing their own food.
If you are thinking about giving up because you did not get it right the first few times, I encourage you to keep trying. Like anything in life, it is much easier once you find a system that works for you.